Les Paul neck repair
I recently uploaded a video onto my YouTube channel which shows the repair of a Les Paul with a completely snapped off headstock. If you would like to watch that video click on this LINK. Since that video was uploaded I have had a number of requests to carry out a Les Paul neck repair.
There are a number of ways to carry out a Les Paul neck repair. The most common method is to insert glue into the crack line and then clamp the two parts of the neck back together. This method works well for most Les Paul neck repairs. But the long term success of this repair does depend on how the neck has cracked. I go into a lot more detail about this in the video. I have seen Les Paul’s which have been repaired and the crack has opened up again.
Another repair method is to strengthen the area around the crack line by inserting splines, one each side of the truss rod. Done well, this repair should guarantee that the crack will not open up again.
So here are some photos of a Les Paul neck repair carried out this year. Actually it’s just one of many similar repairs I have made this year.
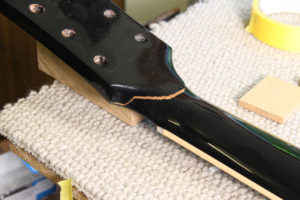
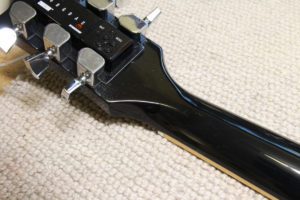
This is a very typical Les Paul neck break. Sometimes the crack goes all the way through to the headstock facing. When it does, the pull of the strings causes a crease in the headstock facing which may also have to be repaired. On this guitar there was some damage to the headstock facing.
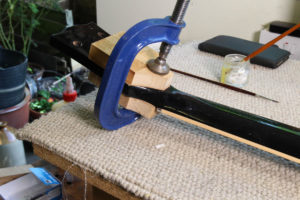
Having removed the tuners, the first stage of the repair is to insert glue into the crack and then clamp the two parts together.
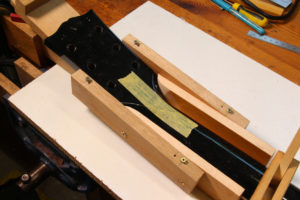
I then set out where I am going to insert the splines and how long they need to be.
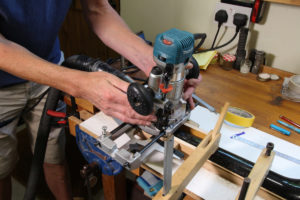
The next stage of the repair is to rout two channels into the back of the neck. To do this I am using a jig I designed some years ago. The jig allows me to control the router, set the length of the splines and gives me good visibility as I work. This part of the repair is taken slowly. I don’t want the router bit to wander or the neck to move.
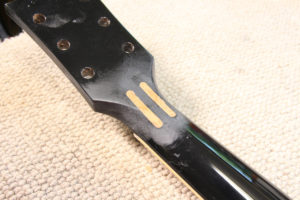
Two mahogany splines are made. This is time consuming work as the rounded ends of the splines need to fit perfectly. Once the splines have been glued in place, they are shaped to match the profile of the neck. Again, this is exacting work. If the splines do not fit perfectly, the location of the splines will become very obvious once the lacquer is applied.
So here is the finished repair. And I am happy with how this repair has turned out. One thing I have learned when carrying out this type of repair is to leave the newly applied lacquer for as long as possible before levelling and buffing out the finish. The fresh paint has a tenancy to sink over time and expose an outline of the splines. That happened on this guitar and I had to apply more lacquer. Black paint is very unforgiving and magnifies the slightest defect.
After the guitar was sent back to it’s owner he sent me this very kind email:
“Hi David, just wanted to let you know that I am very happy with the work you have done on my Gibson les Paul. I am happy for you to work on my guitars if needed and will recommend you to others.”
I have also written a post about the repair of a Les Paul where the neck has snapped off completely. You can read that post by clicking on this LINK